Implementing Extension-Free Screen Sharing App with React and Twilio


Over the past few years, real-time communication via the internet has grown in popularity. Text chats and video conversations are important parts of modern web applications. One of the most interesting and useful features that can help with presentations, team meetings or other similar use cases is screen sharing.
That being said, the actual implementation of screen sharing is not that simple. Due to differences in the implementation in various browsers, there was no common programmatic approach that would work in all of them. What is even worse, because of security concerns the implementation of a screen sharing feature involved implementing and publishing browser extensions that had to be downloaded and installed by the end user. This process drastically lowers user experience and can lead to users not using the feature at all.
Luckily, the W3C Web Real-Time Communications Working Group was working on the specification of the API that should address mentioned problems. Not all browser vendors delivered updated versions of their applications though. We can check the implementation status on the following addresses: Chrome, Firefox, Microsoft Edge and Safari.
The application
Following application uses WebRTC adapter library to minimise the existing differences in current implementation of the new API in different browsers. This article shows how to use the library in different use cases and explains the reason why it was created.
To keep the codebase as small as possible, we use Twilio’s Programmable Video and its API. If you do not have a Twilio account, you can read how to create a free trial account here.
The application consists of node.js backend and React frontend. You can find more details on how to run the application in the repository’s readme file.
How it works
To connect to the video room, we need to perform certain actions:
- Generate access token to get the access rights to the Twilio services.
- Create the audio and video tracks that stream the data from the microphone and camera.
- Use generated token and tracks to connect to the video room.
We are going to use /token endpoint to get an Access Token that will let us do the actual call.
app.get("/token", (req, res) => {
  const token = new AccessToken(
    process.env.TWILIO_ACCOUNT_SID,
    process.env.TWILIO_API_KEY,
    process.env.TWILIO_API_SECRET
  );

  token.addGrant(new VideoGrant());

  token.identity = req.query.user;

  res.send({ token: token.toJwt() });
});
In real-life scenarios, the identity of a user should be fetched from the authentication layer of the application, but in our case, it will be passed as a parameter of a request. By passing the identity, we ensure that each user can have only one active connection with a given video room.
Joining a room is quite simple - we create video and audio tracks using the Twilio API and use them to connect to the room. These tracks will be used to capture and publish the video and audio from our device to Twilio’s servers.
const token = await this.getToken();

const localVideoTrack = await TwilioVideo.createLocalVideoTrack();
this.setState({ localVideoTrack });

const localAudioTrack = await TwilioVideo.createLocalAudioTrack();
this.setState({ localAudioTrack });

const videoRoom = await TwilioVideo.connect(
  token,
  {
    name: roomName,
    tracks: [localVideoTrack, localAudioTrack],
    insights: false
  }
);
To join the room, we need to type the username and name of the room.
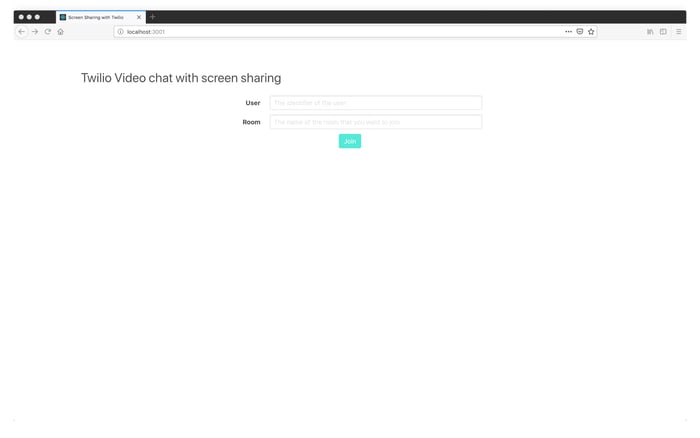
After clicking the Join button we should be able to see the image from our camera.
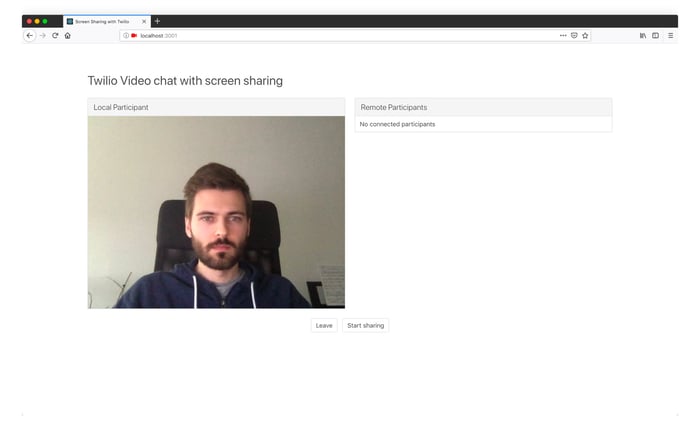
Sharing the screen
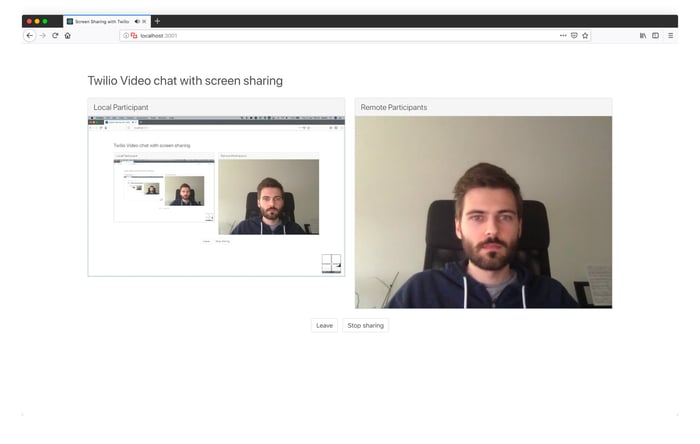
If our browser supports screen sharing API, the Start sharing button should be enabled. If we click on the button, the screen should be shared and we should see its preview instead of the image from the camera.
const stream = await navigator.mediaDevices.getDisplayMedia({
  video: true
});

const newScreenTrack = first(stream.getVideoTracks());

this.setState({
  screenTrack: new TwilioVideo.LocalVideoTrack(newScreenTrack)
});
After that, we need to publish the new track and un-publish the old one that captures the image from the camera (we do not need them both to be published in this example).
Extension-free approach Pros & Cons
Pros
-
Less code to write and maintain
-
Better user-experience due to lack of browser extensions
Cons
-
Limited browser support
You can view the project on
GitHub