Accelerate, SIMD in Image Processing – Introduction

Contents
You might be an iOS developer with solid experience. But when it comes to low-level programming you feel scared anyway.
Swift showed us all that programming language can be easy to read and just nice looking. On the other hand, low-level programming seems to have ignored this trend.
One of many examples of this is the Accelerate framework. It is not so obvious how, why and when to use it.
When you see such a method declaration
vImageConvert_RGBA8888toRGB888(
	&sourceBuffer,
	&destinationBuffer,
	vImage_Flags(kvImageNoFlags))
first thought is: "How to deal with this magic? 😱.
What is Accelerate? 🤔
TLDR: Accelerate is a framework to make mathematical computations faster. To help us define these computations, Accelerate contains some libraries. With them, we don't have to understand every detail to do some magic stuff. 🧙♀️✨
Apple describes this framework as follows: “Make large-scale mathematical computations and image calculations, optimized for high performance and low-energy consumption. (…) Accelerate provides high-performance, energy-efficient computations on the CPU by leveraging its vector-processing capability.” It’s useful when you have a significant workload to run on the CPU. Inside Accelerate there’s a lot of libraries, like vImage for image processing, the Swiss knife of image processing. (WWDC2017-711)
We don’t have to understand what actually happens in every detail, but let's at least look into what every specific sub-library does.
Let’s check the list of sub-libraries below:
- vImage: You can manipulate images, convert them to another format or add a custom filter.
- vDSP: DSP stands for Digital Signal Processing. When you have a series of numerical data placed in some domain (for example, sound samples in the time domain, or pixels in the dimension domain), you can process this data using this library.
- vForce: Calculations on vectors can be done so much faster with this library.
- BLAS, LAPACK, LinearAlgebra, Sparse BLAS, Sparse Solvers: Faster matrix computations.
- BNNS: Neural networks
- SIMD: Allows us to talk directly with CPU vector units.
- Compression: Lossless data compression
It is clearly visible that the power of Accelerate cannot be described in a single post. However, a single post can be a great way to begin this inspiring journey! 🧳😄
Why it is worth learning 🤔
TLDR: Accelerate means efficiency in terms of mathematical computation, even these simple ones. Many APIs lead to less room for error because, for many common operations, the API has an equivalent method. Accelerate also provides continuous support for the newest Apple hardware. Instead of being angry about the unsightly method definitions be thankful that someone implemented this in an efficient way. 🔥⏩
To understand why it is worth learning Accelerate let’s consider the following subjects. If you want to try this code, don't forget to import Accelerate. 😄
Efficiency even in simple operations 👌
The first answer to the question “How to multiply a series of numbers by a single value” ...
let x:[Float] = [0,1,2,3,4,5]
let n = x.count
var y = Array.init(repeating: Float(0), count: n)
var scale:Float = 2
... is just “use a for loop”.
for i in 0..<n {
	y[i] = scale * x[i]
}
But with Accelerate this can be done a lot faster.
vDSP_vsmul(x, 1, &scale, &y, 1, vDSP_Length(n))
Yeah, it seems uglier, but it is significantly faster! Apple says that Accelerate, in this case, is 6 times faster and more energy-efficient! Now you can check the docs for this method to see how well you understand all of these things: https://developer.apple.com/documentation/accelerate/1450020-vdsp_vsmul
Note: In 2019, Apple introduced some refined methods for Swift. One of them is vDSP_vsmul. You can check out the documentation here: https://developer.apple.com/documentation/accelerate/vdsp-snv
// Old
vDSP_vsmul(x, 1, &scale, &y, 1, vDSP_Length(n))
// New, but iOS 13 or macOS 10.15 is required.

vDSP.multiply(scale,x)
Apple calls these updated methods "Swift overlays". Keep this in mind if your event want to google one of them 😄.
Far less room for error ❌🕷
Consider matrix multiplication:
var a:[Float] = [1, 2, 3, 1, 2, 3, 1, 2, 3]
var b:[Float] = [1, 0, 0, 0, 1, 0, 0, 0, 1]
var c:[Float] = [0, 0, 0, 0, 0, 0, 0, 0, 0]
var d:[Float] = [0, 0, 0, 0, 0, 0, 0, 0, 0]
let m = 3
let n = 3
let p = 3

for row in 0..<m {
    for col in 0..<n {
        for k in 0..<p {
            c[row + m * col] += a[row + m * k] * b[k + p * col]
        }
    }
}
Can you count how many places are prone to errors? I can’t 😄
Let’s check Accelerate’s implementation:
cblas_sgemm(
    CblasColMajor, /// This param describes how to parse matrix array.
    CblasNoTrans, /// Input matrix can be transposed optionally!
    CblasNoTrans,
    Int32(m),
    Int32(n),
    Int32(p),
    1.0, // Scaling factor for the product of matrices A and B. Simply multiplification requires that this parameter is equal to one.
    &a, // Reference to A matrix.
    Int32(m),
    &b, // Reference to B matrix
    Int32(p),
    0.0, // Scaling factor for matrix C. Doesn't matter here.
    &c, // Reference to C matrix.
    Int32(m) //The size of the first dimension of matrix C)
)
This time code is 100 times faster and 26 times more energy efficient. Really great!
Many APIs 🔌🔌🔌
Accelerate provides approximately 2800 APIs, which leads to less code, more efficiency and more performance. Accelerate takes care of multithreading and hardware architecture compatibility. Exploring Accelerate's possibilities can lead to really great apps.
Apple’s support 🍏
As it is Apple’s framework, you can be sure that solutions implemented in Accelerate will benefit fully from the power of new hardware.
What is SIMD? 🤔
I guess you have noticed that Accelerate methods require passing additional parameters that seem redundant For example, in matrix multiplication, we also need to pass the size of the matrix. Let’s consider the following calculation:
With Accelerate:
import Accelerate
var A: [Float] = [1,0,0,0,2,0,0,0,3]
var x: [Float] = [1,1,1]
var y = [Float](repeating:0, count:3)
cblas_sgemv(CblasColMajor, CblasNoTrans, 3, 3, 1, &A, 3, &x, 1, 0, &y, 1)
With GLKit:
import GLKit
let A = GLKMatrix3(m: (1, 0, 0, 0, 2, 0, 0, 0, 3))
let x = GLKVector3(v: (1, 1, 1))
let y = GLKMatrix3MultiplyVector3(A, x)
With SIMD:
import simd
let A = float3x3(diagonal: [1,2,3])
let x = float3(1, 1, 1)
let y = A*x
Do you see the differences? Usable initializers for diagonal matrices and vertical vectors and straightforward multiplication operators.
Doing countless operations like this really makes you appriciate SIMD 😄.
Where to start?
TLDR: Apple provides a nice set of documentation. Some of these articles are strictly mathematical, but most of them are focused on practical stuff.
Apple provides set a of example projects to show us how to use Accelerate. What do these terms actually mean? Let’s do an overview of Accelerate's documentation (https://developer.apple.com/documentation/accelerate) What we can find there?
- Image Processing Essentials.
- Image processing performs conversions between the format that you have, and the formats that Accelerate works with.
- vImage works on buffers, so a separate article is provided about how to work with them.
- As the user wants to see results as quickly as possible, vImage allows creating a displayable representation of buffers.
- Image processing is an entire workflow. You must get an image, process it into a usable form, do some operations on it, and create a displayable form. How to connect all these steps? This is described in a separate article.
- Sometimes we don't want to process the entire image, but just some regions. This is also possible!
- Accelerate gives a huge boost in performance, but some improvements are always possible. The documentation also covers this subject.
- Signal Processing Essentials. Raw signal processing.
- Operate selectively on the elements of a vector at regular intervals.
- Data interpolation! With this, you can “fill the gaps in arrays of numerical data.”. A really great feature when your signal is incomplete and, instead of displaying gaps, you want to make your graph smoother.
- Resampling a signal with decimation. It is a great feature, if you want to reduce the resolution of the signal and lose as few details as possible.
- Core Video Interoperation. Image processing is not limited only to static images, but can also be used for real-time video effects!
- Vectors, Matrices, and Quaternions. Imagine defining some 3d objects. How to make them move or rotate smoothly? You will find the answer here.
- Fourier and Cosine Transforms. Imagine that you want to remove noise effect from an image. Fourier and cosine transforms allow you to do that by finding items in a set of data that don’t really matter and removing them without changing the signal or the image significantly.
- Audio Processing. Accelerate contains cosine transform implementation, which is really useful for audio processing. Separate articles from Apple show us how it works.
- Conversion Between Image Formats. The abundance of formats of images and many color spaces (RGB, CMYK, etc.) force us to do many conversions, so no wonder that a separate article covers that.
- Image Resampling. In processing images in various ways we must control the size of our results. Resampling is basically for that.
- Convolution and Morphology. Blurring and bokeh effect take into account not just some specific pixel, but also the pixels around that pixel. This type of processing is addressed here.
- Color and Tone Adjustment. Here Apple introduces us histograms. For example, you can align colours between images. This makes both images have the same colour palette.
- vImage / vDSP Interoperability. Finding the sharpest image in a sequence of captured images. Really awesome!
- Sparse Matrices. If you remember equations with unknowns, here is the topic for you.
- Compression. In my opinion it is great that we can compress data by ourselves. That means a whole new level of security 😃
Now we have idea of what we can achieve with Accelerate. Let’s do some example. As easy as possible. 😎
Image Processing 🖼
TLDR: Apple provides a demo project, where we can learn how to implement custom image processing, and analyze the differences between used data formats.
All these things can be useful for making complex calculations, but in my opinion, the most convenient way to make this knowledge really practical is by doing some image processing. Let’s go to the Real-Time Video Effects with vImage tutorial and just download the example project. You will find a lot of detailed information on how it works there.
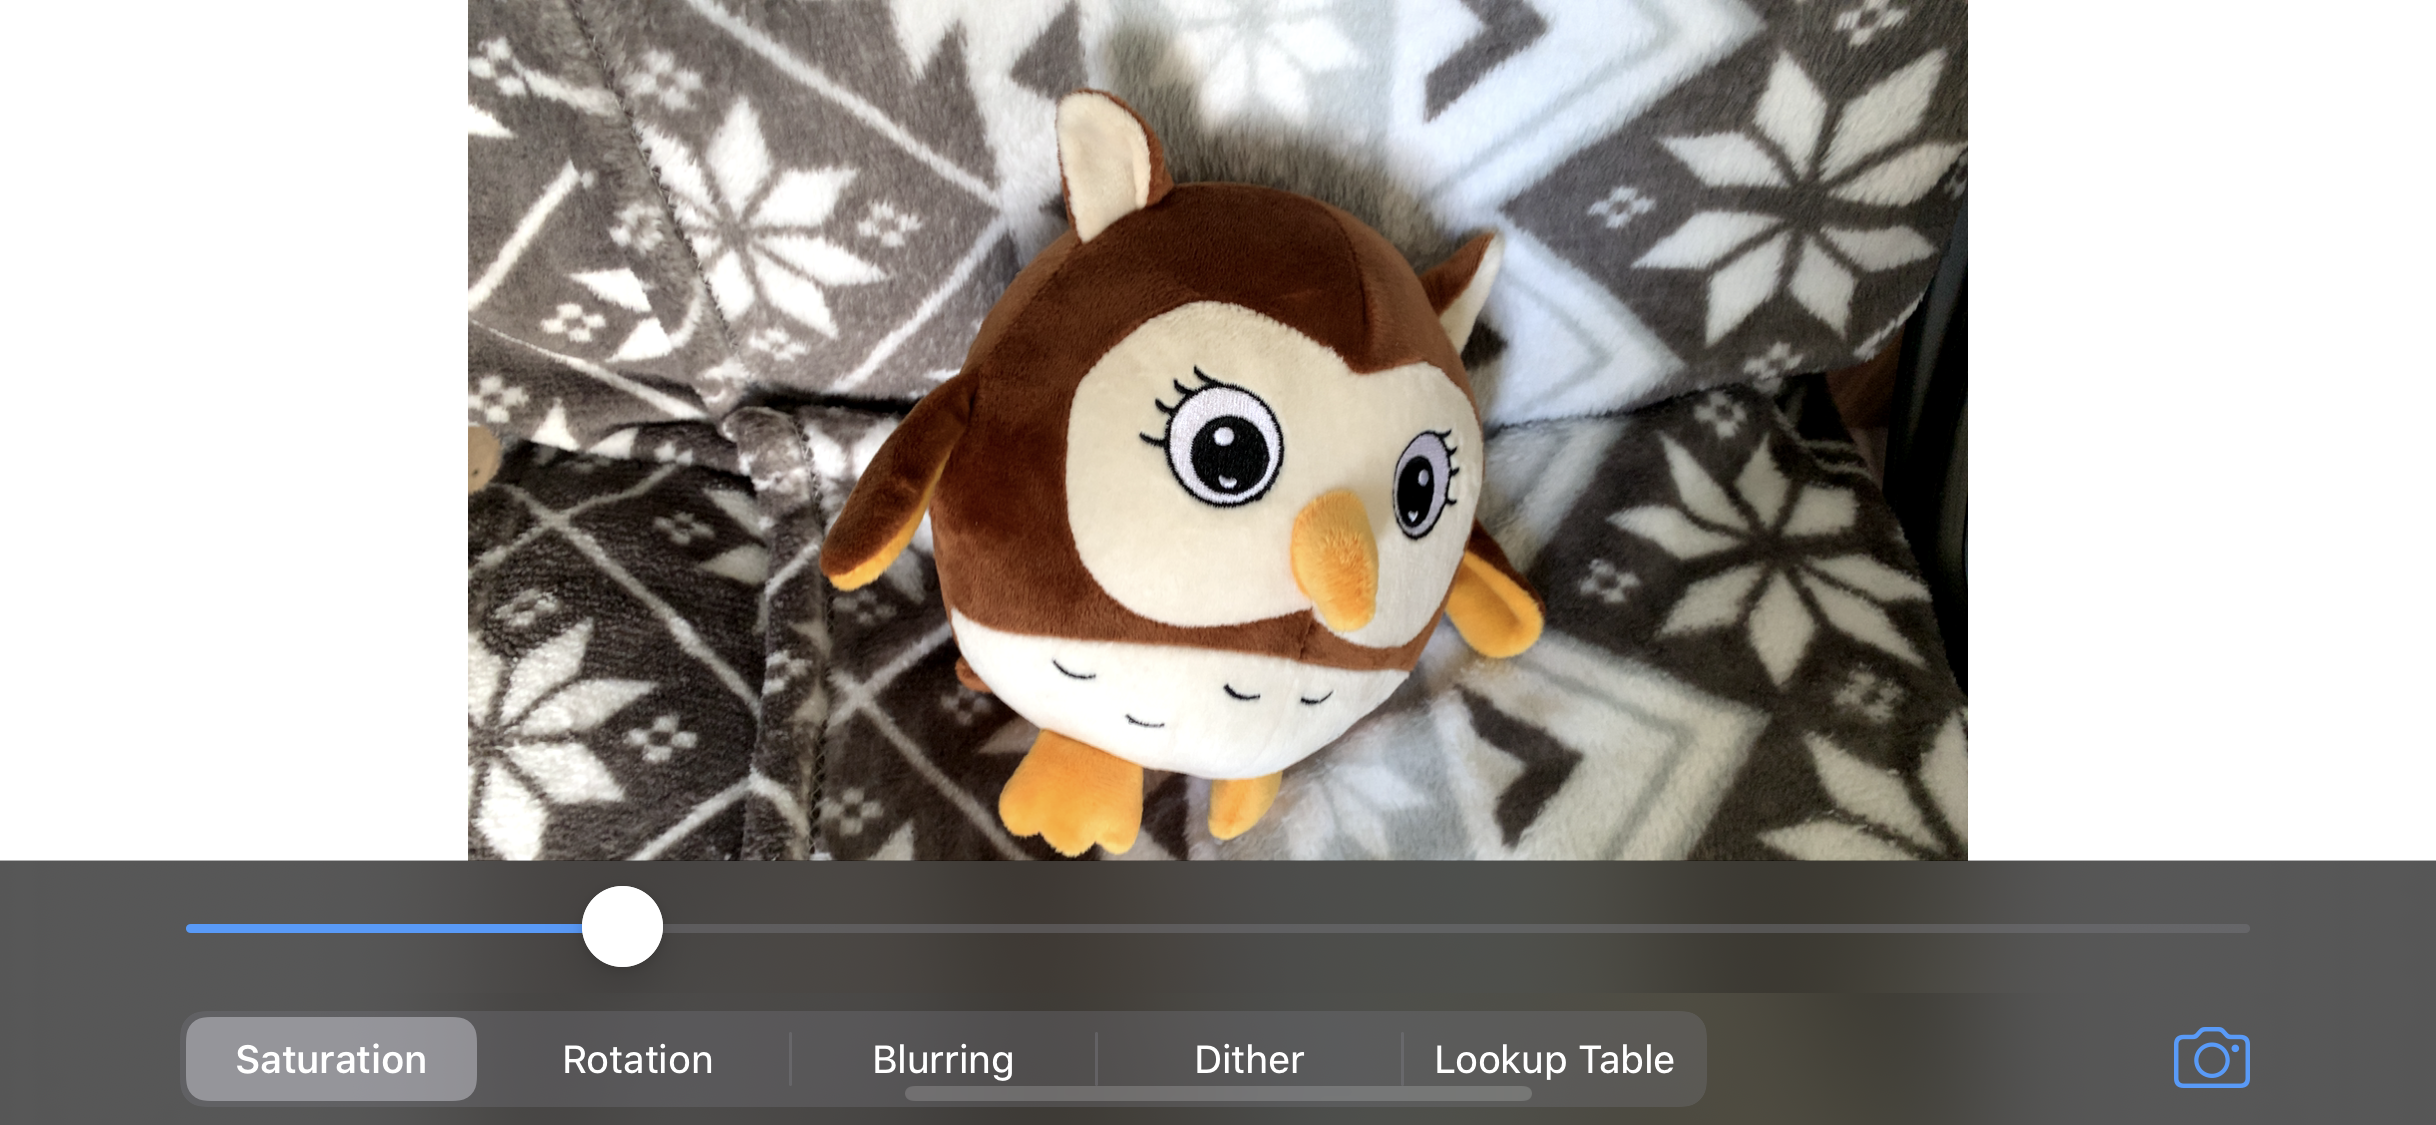
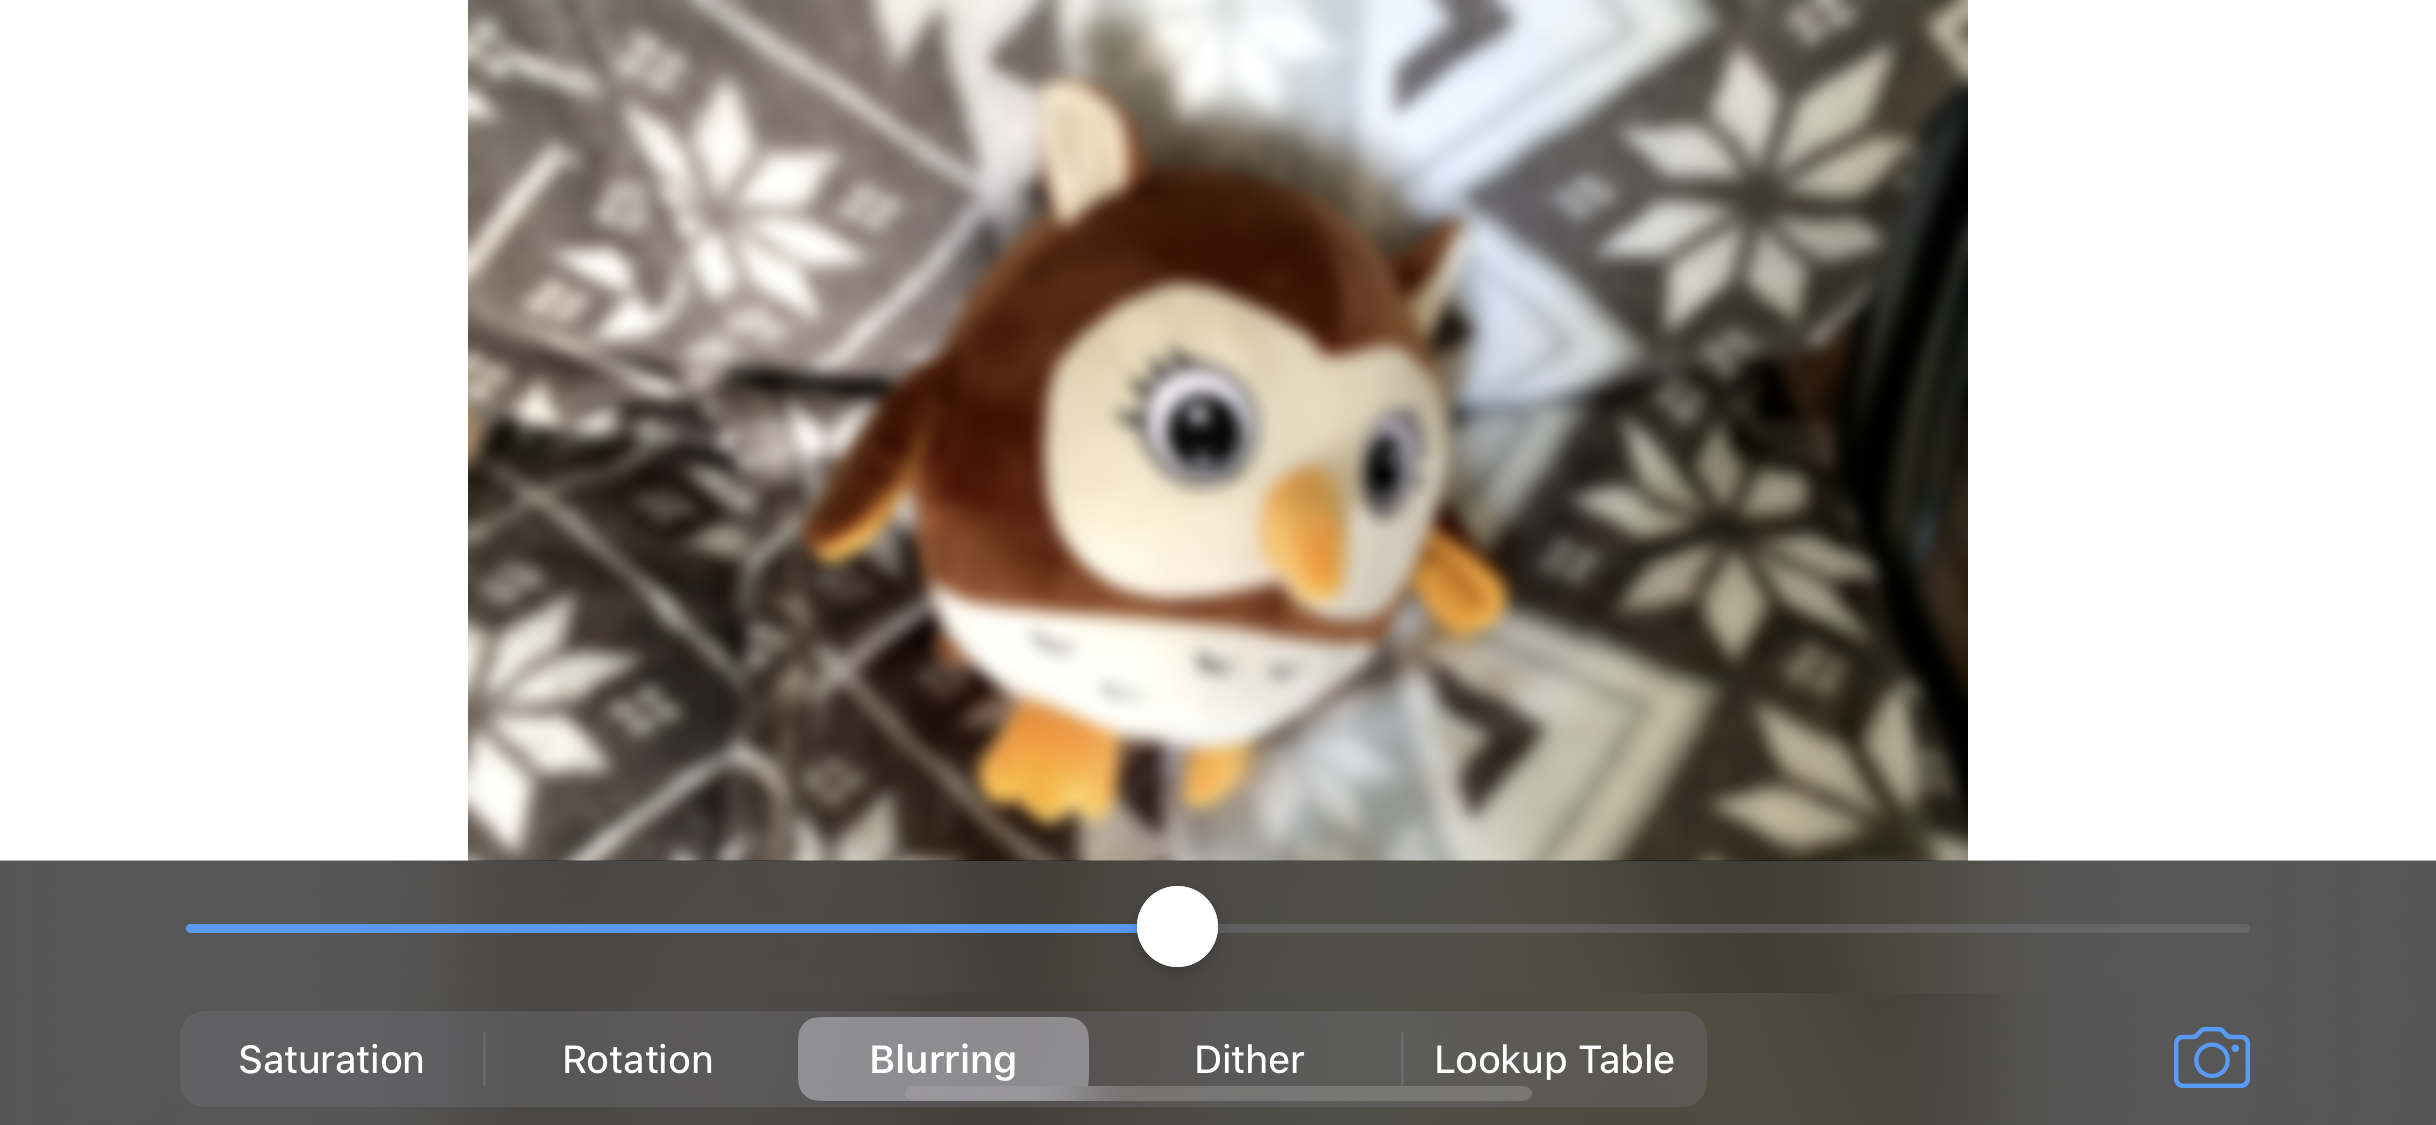
Basically, this example app provides a set of custom video filters. I made some screenshots of this app for you. Let’s add another filter!
Open the project and the ViewController.swift file. Find the DemoMode enum. Let’s add another case to this enum, for our filtering type.
enum DemoMode: String {
case saturation = "Saturation"
case rotation = "Rotation"
case blur = "Blurring"
case dither = "Dither"
case lookupTable = "Lookup Table"
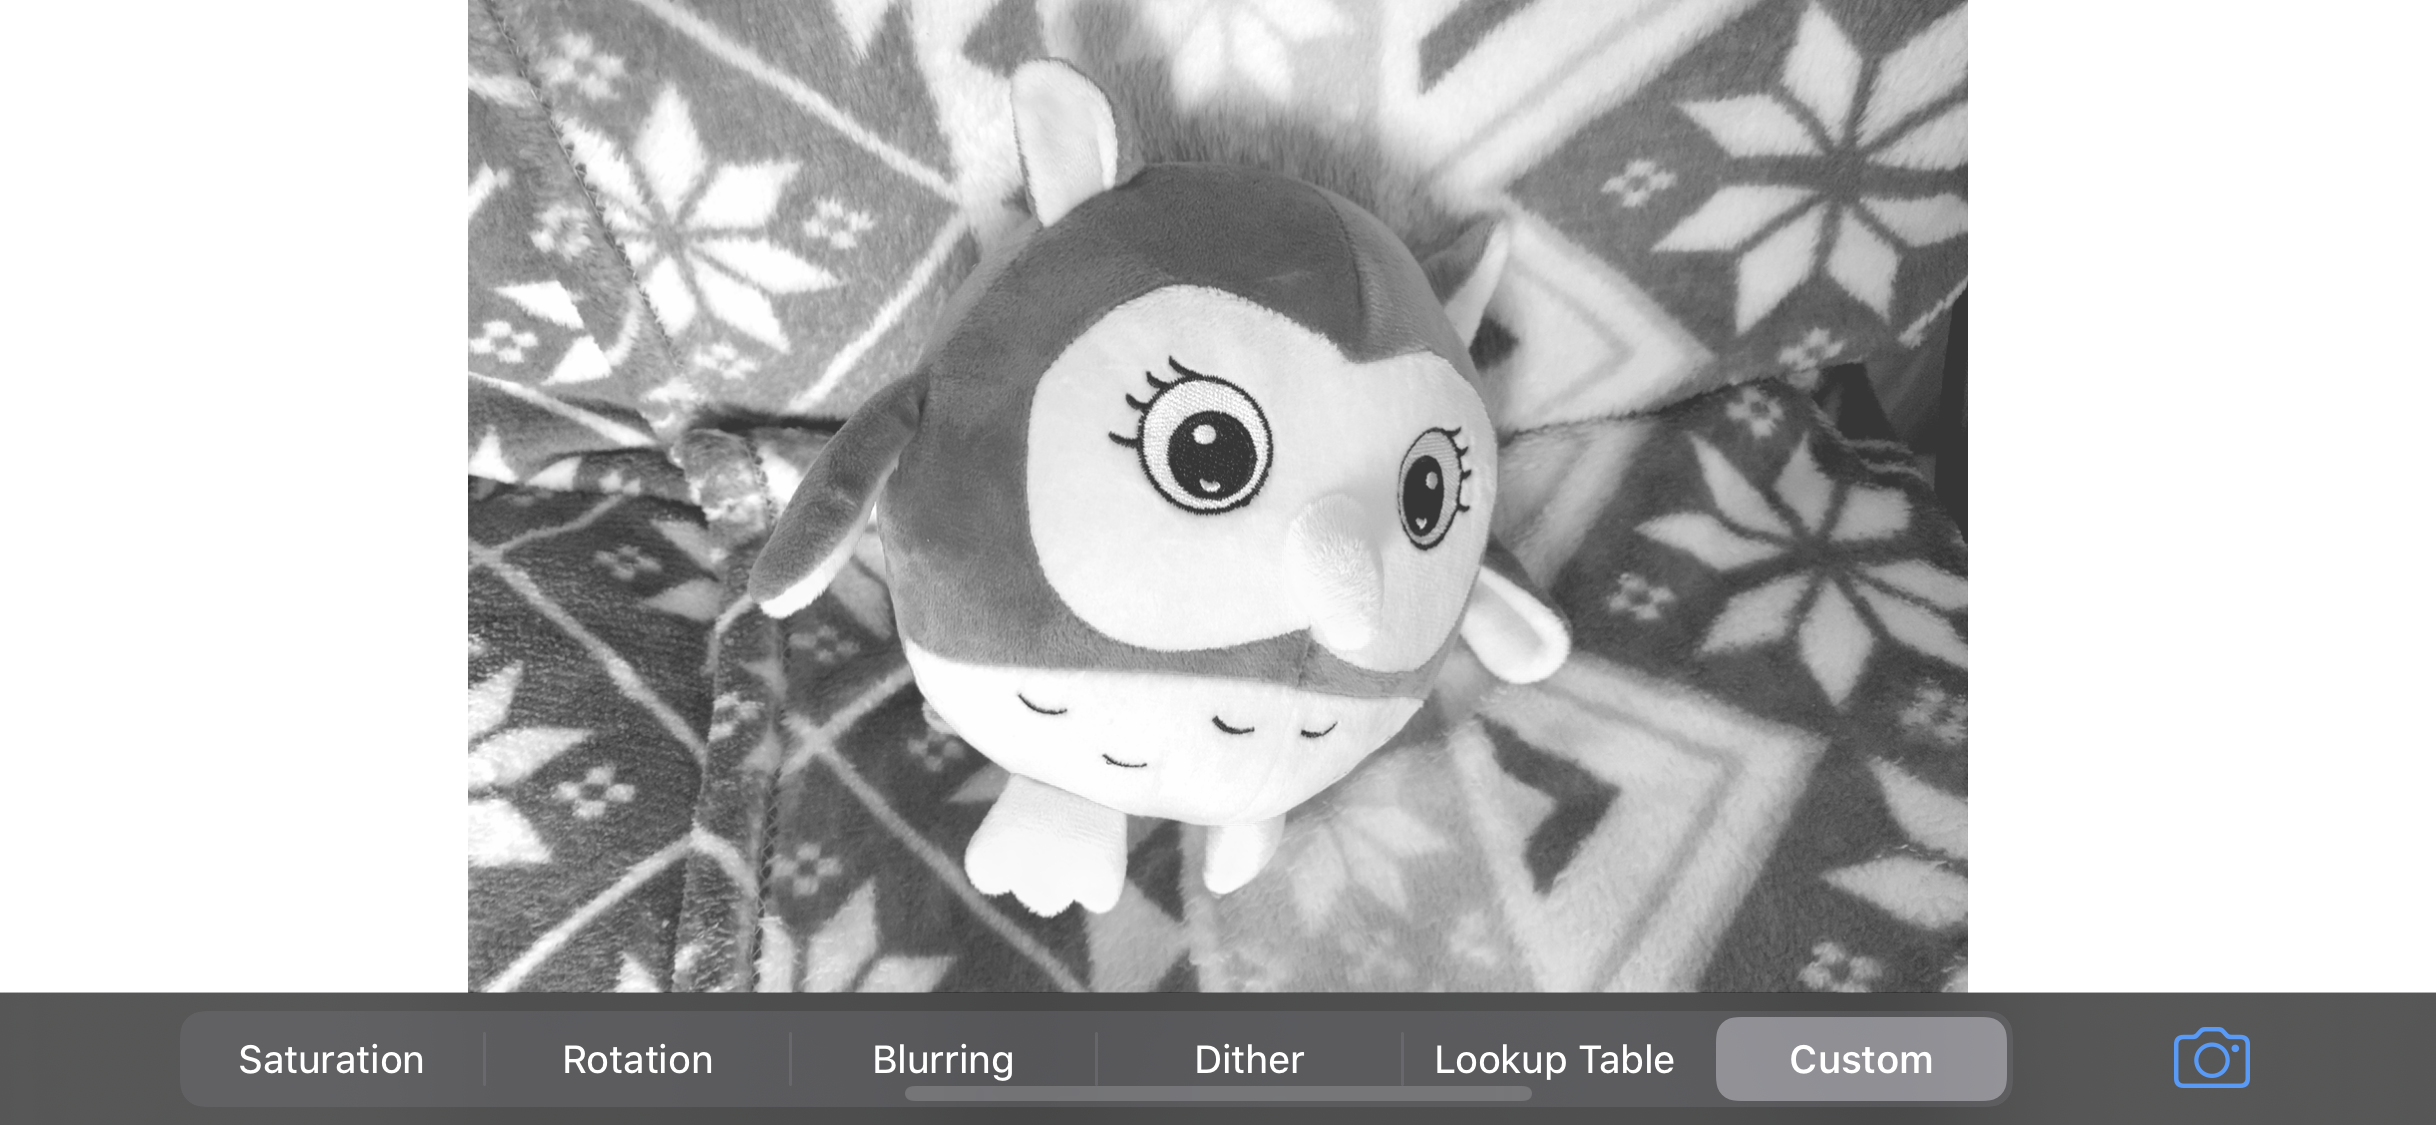
case custom = "Custom" // Our custom type.
}
Find the let modeSegmentedControlItem declaration. Here we can implement add our custom type to segmented control.
let segmentedControl = UISegmentedControl(items:[
	DemoMode.saturation.rawValue,
	DemoMode.rotation.rawValue,
	DemoMode.blur.rawValue,
	DemoMode.dither.rawValue,
	DemoMode.lookupTable.rawValue,
	DemoMode.custom.rawValue
])
Find func displayYpCbCrToRGB(pixelBuffer: CVPixelBuffer). Here we will implement our custom filter.
Find the switch statement.
        switch mode {
        case .rotation:
            let backcolor: [UInt8] = [255, 255, 255, 255]
Add our custom filter by implementing case .custom.
case .custom:
		// Change these coefficient constants and check result!
		let redCoefficient: Float = 0.2126
		let greenCoefficient: Float = 0.7152
		let blueCoefficient: Float = 0.0722
		// Divisior is used for normalisation.
		// By using this value we take care about cases when a computed pixel is above the displayable value
		// (for example in RGB format, color (255,250,700) is invalid)
		let divisor: Int32 = 0x1000
		let fDivisor = Float(divisor)

		// Each pixel will be multiplied by these values.
		var coefficientsMatrix = [
		    Int16(redCoefficient * fDivisor),
		    Int16(greenCoefficient * fDivisor),
		    Int16(blueCoefficient * fDivisor)
		]
		let preBias: [Int16] = [0, 0, 0, 0] // These values will be added before processing to each channel of a pixel.
		let postBias: Int32 = 2 // This value will be added to each pixel at the end of processing.

		// Fill our temporary buffer with initial data
		var tmpBuffer = vImage_Buffer()
		vImageBuffer_Init(&tmpBuffer,
		                  destinationBuffer.height,
		                  destinationBuffer.width,
		                  cgImageFormat.bitsPerPixel,
		                  vImage_Flags(kvImageNoFlags))
		// Fill our temporary buffer with initial data
		vImageCopyBuffer(&destinationBuffer,
		                 &tmpBuffer,
		                 4,
		                 vImage_Flags(kvImageNoFlags))
		// Produce single channel data.
		vImageMatrixMultiply_ARGB8888ToPlanar8(&tmpBuffer,
		                                        &destinationBuffer,
		                                        &coefficientsMatrix,
		                                        divisor,
		                                        preBias,
		                                        postBias,
		                                        vImage_Flags(kvImageNoFlags))

		free(tmpBuffer.data) // Skip this line, and app will crash!
After this, we also need to implement another type conversion to displayable type, because we switched to a single channel image (monochromatic images can be represented by just one channel for each pixel). Let’s handle this issue as quickly as possible by just catching this case and swapping image the format in vImageCreateCGImageFromBuffer.
        let monoFormat = vImage_CGImageFormat(
            bitsPerComponent: 8,
            bitsPerPixel: 8,
            colorSpace: Unmanaged.passUnretained(CGColorSpaceCreateDeviceGray()),
            bitmapInfo: CGBitmapInfo(rawValue: CGImageAlphaInfo.none.rawValue),
            version: 0,
            decode: nil,
            renderingIntent: .defaultIntent
        )

        var format = mode == .custom ? monoFormat : cgImageFormat

        let cgImage = vImageCreateCGImageFromBuffer(&destinationBuffer,
                                                    &format,
                                                    nil,
                                                    nil,
                                                    vImage_Flags(kvImageNoFlags),
                                                    &error)

        if let cgImage = cgImage, error == kvImageNoError {
            DispatchQueue.main.async {
                self.imageView.image = UIImage(cgImage: cgImage.takeRetainedValue())
            }
        }
Yeah! It works 😃
This is just a simple example. For starters I recommend just to download Apple’s demos, mix them, and analyse the differences.
Most of the difficulties with understanding all of these things are caused by different data domains. We convert some data from one domain to another to make special processing possible. The key to understanding the power of Accelerate is understanding how each domain works. We can save images as three two-dimensional arrays of basic colors (Red, Green, Blue), we can save images as a result of the Fourier transform, we can save images as series of compressed data. Each format has different advantages. Use them to do some magic! 😄🧙🏻♂️✨
And that’s it. 😅


