How To Add Native Screens With Navigation to Your React Native Application (Android)

Contents
This article is about adding a native screen into a React Native application.
During this tutorial, we will use Kotlin to add native navigation and screens to a React Native app.
We will be able to move between the React Native and native screens. Adding native screens to an app is useful when we need another security layer, for example, if we would like to add a payment screen. Another thing it does is offload the JavaScript thread.
For the purpose of this tutorial, I’ve created a simple React Native (RN) app that displays some native and some RN screens. We will create two RN screens and three native screens. We will create the native screens as a React Native Module.
Initial setup
The best way to create a React Native module is to use bob. Bob is a simple CLI to scaffold and build React Native libraries.
To create the module just use the npm command.npx @react-native-community/bob create react-native-awesome-module
Bob will ask you some questions about the package name, description, author, etc.
The most important question is, “What type of package do you want to develop?” Please choose “Native module in Kotlin and Swift”.
Bob will generate all the needed files and an example directory with React Native Application. We will use an example directory to test our module.
Let’s open the example directory, and install React Navigation using the commands below.
npm install @react-navigation/native

npm install react-native-reanimated react-native-gesture-handler react-native-screens react-native-safe-area-context @react-native-community/masked-view

npm install @react-navigation/stack
Create a “navigation” directory, inside of it create “RootNavigation.tsx”. In this step, we will add two screens into React Native.
import 'react-native-gesture-handler';
import * as React from 'react';
import { NavigationContainer } from '@react-navigation/native';
import { createStackNavigator } from '@react-navigation/stack';
import Main from '../screens/Main';
import 'react-native-gesture-handler';
import Another from '../screens/Another';

const RootNavigation = () => {
 const Stack = createStackNavigator();

 return (
   <NavigationContainer>
     <Stack.Navigator>
       <Stack.Screen name="Home" component={Main} />
       <Stack.Screen name="Another" component={Another} />
     </Stack.Navigator>
   </NavigationContainer>
 );
};
export default RootNavigation;
Then add the code below to “App.js”.
import RootNavigation from './navigation/RootNavigation';

export default function App() {
 return <RootNavigation />;
}
Create a “screens” directory, then inside of it create “Main.tsx” and “Another.tsx“.
import React from 'react';
import { View, Text } from 'react-native';

const Another = () => {
 return (
   <View style=>
     <Text>Another RN Screen</Text>
   </View>
 );
};

export default Another;
In “Main.tsx”, we are using “ModuleName.showView()” to display “native screens stack”.
import React from 'react';
import { View, Button } from 'react-native';
import ModuleName from 'module-name';
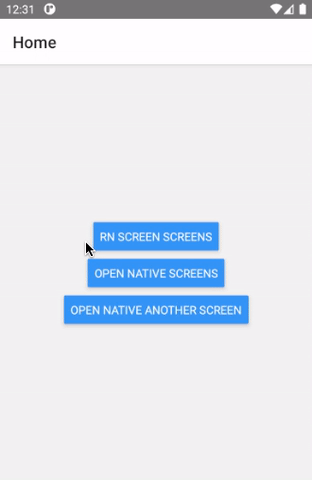
const Main = ({ navigation }) => {
return (
<View style=>
<Button
onPress={() => navigation.navigate('Another')}
title={'RN Screen Screens'}
/>
<View style= />
<Button
onPress={() => ModuleName.showView()}
title={'Open Native Screens'}
/>
<View style= />
<Button
onPress={() => ModuleName.showViewNavigateTo(second)}
title={'Open Native Another Screen'}
/>
</View>
);
};
export default Main;
Now it’s time to add “showView” and “showViewNavigateTo” to our module. 🚀🚀
Open “index.tsx” in the module root directory and add it. It will expose the native methods and we will be able to call them in React Native.
type ModuleNameType = {
 showView(): Promise<void>;
 showViewNavigateTo(text?: string): Promise<void>;
};
Native Screens Implementation (Android)
In this step, we have to add navigation to the native part of the app. Then we will add some native screens and we will attach native navigation to the React Native activity. After these steps, we will be able to display the native screens stack.
For the steps below please use Android Studio.
First of all, open the “android” directory located in the module’s root directory.
Add the code below to “android/src/main/java/com/moduleName/ModuleNameModule.kt”.
Because React Native bridge doesn’t support method overloading, we are creating two methods:
- “showView” will display the root stack of our native navigation.
- “showViewNavigateTo” — using this method you can navigate to a specific native screen.
Using
val intent = Intent(reactApplicationContext, ModuleNameActivity::class.java)
we attach our activity to the React Native process.
@ReactMethod
fun showView(promise: Promise) {
 val intent = Intent(reactApplicationContext, ModuleNameActivity::class.java)
 intent.addFlags(Intent.FLAG_ACTIVITY_NEW_TASK)
 reactApplicationContext.startActivity(intent)
 promise.resolve(true)
}

@ReactMethod
fun showViewNavigateTo(text: String? = "", promise: Promise) {
 val intent = Intent(reactApplicationContext, ModuleNameActivity::class.java)
 intent.addFlags(Intent.FLAG_ACTIVITY_NEW_TASK)
 intent.putExtra("screenId", text)
 reactApplicationContext.startActivity(intent)
 promise.resolve(true)
}
Navigation setup
To create a native stack, we have to install a native navigation component package. Let's add the code below to “android/build.gradle”.
We need to add android navigation to dependencies at the bottom of the file.
dependencies {
 // noinspection GradleDynamicVersion
 api 'com.facebook.react:react-native:+'
 implementation "org.jetbrains.kotlin:kotlin-stdlib:$kotlin_version"

 // Add below code
 def nav_version = "2.3.5"
 implementation "androidx.navigation:navigation-fragment-ktx:$nav_version"
 implementation "androidx.navigation:navigation-ui-ktx:$nav_version"

}
After navigation dependencies are added we should create “nav_graph”. To add a navigation graph to your project, do the following:
- Create a “res” directory in “root/android/src/main/”.
- In the Project window, right-click on the res directory and select New > Android Resource File. The New Resource File dialog appears.
- Type a name in the File name field, such as "nav_graph".
- Select Navigation from the Resource type drop-down list, and then click OK.
You should end up with the view presented on the screen below. We created a navigation graph, in this file we are able to add native screens.

Then create “view_layout.xml” in “res/layout” and paste the code below. In this step, we are embedding navigation to view with a header.
NavHostFragment provides an area within your layout for self-contained navigation to occur. More about NavHostFragment.
<?xml version="1.0" encoding="utf-8"?>
<FrameLayout xmlns:android="http://schemas.android.com/apk/res/android"
 xmlns:app="http://schemas.android.com/apk/res-auto"
 android:layout_width="match_parent"
 android:layout_height="match_parent">

 <com.google.android.material.appbar.AppBarLayout
   android:layout_width="match_parent"
   android:layout_height="wrap_content">

   <androidx.appcompat.widget.Toolbar
     android:id="@+id/toolbar"
     android:layout_width="match_parent"
     android:layout_height="?attr/actionBarSize"
     android:background="?attr/colorPrimary" />

 </com.google.android.material.appbar.AppBarLayout>

 <fragment
   android:id="@+id/fragment_nav"
   android:name="androidx.navigation.fragment.NavHostFragment"
   android:layout_width="match_parent"
   android:layout_height="match_parent"
   app:defaultNavHost="true"
   app:navGraph="@navigation/nav_graph" />
</FrameLayout>
When we are done with the navigation graph we are able to create our navigation activity. To do it, in “src/main/java/com.yourpackagename/” create a file named “ModuleNameActivity.kt” or use your own name and fill it with the code below. Using the value passed to intent “val screenId = intent.getStringExtra("screenId")”, we are able to navigate to a specific native screen from the React Native side.
package com.reactnativeawesomemodulern //<--Change to your package name

import android.os.Bundle
import androidx.appcompat.app.AppCompatActivity
import androidx.navigation.NavController
import androidx.navigation.Navigation
import androidx.navigation.ui.setupActionBarWithNavController

class ModuleNameActivity : AppCompatActivity() { // If you are using custom name change it here

 lateinit var nav: NavController
 override fun onSupportNavigateUp(): Boolean = nav.navigateUp()
 override fun onCreate(savedInstanceState: Bundle?) {
   super.onCreate(savedInstanceState)

   setContentView(R.layout.view_layout)
   setSupportActionBar(findViewById(R.id.toolbar))

   nav = Navigation.findNavController(this, R.id.fragment_nav)

   setupActionBarWithNavController(nav)

   val screenId = intent.getStringExtra("screenId")

   when (screenId) {
     "first" -> nav.navigate(R.id.firstFragment)
     "second" -> nav.navigate(R.id.secondFragment)
   }
 }


}
Then we have to register it in “AndroidManifest.xml” and add the code below to your file. Remember to change the package name and the module name to your own.
...
<application>
<activity android:name="com.packageName.ModuleNameActivity" /><!--  Change package name and Module name to your own  -->


</application>
 ...
</manifest>
Finally ✨, we can create native screens. To do so, open the previously created “nav_graph”. In the opened file:
- Press add ( + icon).
- Create a new destination.

In the pop up select Fragment (Blank) then press Next. In the fragment name type “MainAppFragment”. Select Kotlin in Source Language and press Finish. It adds two files to your project:
- An xml layout file.
- The screen controller file.
Open the xml layout file in text editor mode and paste in the code below. It will create a layout with two buttons.
<?xml version="1.0" encoding="utf-8"?>

<LinearLayout xmlns:android="http://schemas.android.com/apk/res/android"
 android:layout_width="match_parent"
 android:layout_height="match_parent"
 android:gravity="center"
 android:orientation="vertical">

 <Button
   android:id="@+id/next_screen_button"

   android:layout_width="wrap_content"
   android:layout_height="wrap_content"
   android:layout_marginBottom="10dp"
   android:text="Go to next Screen" />

 <Button
   android:id="@+id/another_screen_button"

   android:layout_width="wrap_content"
   android:layout_height="wrap_content"
   android:text="Go to another Screen" />
</LinearLayout>
Then open “MainAppFragment.kt” and paste the code presented below. Remember to replace the package name with your own. In this step we are creating a controller for our main native navigation screen. On the screen we have two buttons with bounded actions. On-press methods are connected to buttons by setting up an onClickListener to each element.
package com.reactnativeawesomemodulern // <- Remember to replace package name with your own

import android.os.Bundle
import android.view.View

import android.widget.Button
import androidx.fragment.app.Fragment
import androidx.navigation.fragment.findNavController

class MainAppFragment : Fragment(R.layout.fragment_main_app) {

 override fun onViewCreated(view: View, savedInstanceState: Bundle?) {
   super.onViewCreated(view, savedInstanceState)
   val firstButton: Button = view.findViewById<Button>(R.id.next_screen_button)

   val secondButton: Button = view.findViewById<Button>(R.id.another_screen_button)

   firstButton.setOnClickListener {
     this.onButtonPress()
   }
   secondButton.setOnClickListener {
     this.onSecondButtonPress()
   }
 }

 private fun onButtonPress() {
   findNavController().navigate(R.id.firstFragment)
 }

 private fun onSecondButtonPress() {
   findNavController().navigate(R.id.secondFragment)
 }

}
Create another two screens (FirstFragment, SecondFragment) as explained above and replace their content with the code below.
FirstFragment
Layout File
<?xml version="1.0" encoding="utf-8"?>

<LinearLayout xmlns:android="http://schemas.android.com/apk/res/android"
 android:layout_width="match_parent"
 android:layout_height="match_parent"
 android:gravity="center"
 android:orientation="vertical">

 <TextView
   android:id="@+id/textView"
   android:layout_width="wrap_content"
   android:layout_height="wrap_content"
   android:text="First Screen"
  />

</LinearLayout>
Kotlin file “onCreateView” method
package com.reactnativeawesomemodulern // <- Remember to replace package name with your own

import androidx.fragment.app.Fragment

class FirstFragment : Fragment(R.layout.fragment_first) {}
SecondFragment, in this screen we are allowing the user to close the native stack by pressing the close button. Using “activity?.finish();”, we are exiting the native screen that is being displayed above our React Native screens.
Layout File
<?xml version="1.0" encoding="utf-8"?>

<LinearLayout xmlns:android="http://schemas.android.com/apk/res/android"
 android:layout_width="match_parent"
 android:layout_height="match_parent"
 android:gravity="center"
 android:orientation="vertical">

 <TextView
   android:id="@+id/textView"
   android:layout_width="wrap_content"
   android:layout_height="wrap_content"
   android:text="Second Screen" />

 <Button
   android:id="@+id/close_button"
   android:layout_width="wrap_content"
   android:layout_height="wrap_content"
   android:text="Close" />
</LinearLayout>
Kotlin file
package com.reactnativeawesomemodulern

import android.os.Bundle
import android.view.View
import android.widget.Button
import androidx.fragment.app.Fragment

class SecondFragment : Fragment(R.layout.fragment_second) {

 override fun onViewCreated(view: View, savedInstanceState: Bundle?) {
   super.onViewCreated(view, savedInstanceState)

   val closeButton: Button = view.findViewById<Button>(R.id.close_button)

   closeButton.setOnClickListener {
     this.onCloseButtonPress()
   }
 }

 private fun onCloseButtonPress() {
   activity?.finish();
 }

}
To change screen titles on the navigation bar, open “nav_graph.xml” in editor mode.

And replace every android:label="Screen Name" with the required screen name.
And we are done! Open the example app and you will be able to navigate between native and RN screens.
Thanks to using react-native-bob we are able to use our native screens as a React Native module. The only thing we have to do is to call “npm pack” at the root of the module folder.
Then we move the file generated to the project and add "react-native-awesome-module-rn": "file:react-native-awesome-module-rn-0.1.0.tgz" to the dependencies in package.json.
Now you can import and use those screens as a module! 🎉🎉
Example code available here.
Conclusion
Using native screens in React Native can be useful when we require an additional layer of security or if we would like to present a screen that is hard to achieve or not optimal when created with React Native. This tutorial shows the real potential of React Native, where we are able to add a native solution to any development step of an existing application created with React Native.


