What the Mobile App Development Process Looks Like – All Steps Explained

Contents
The mobile app market is like the universe itself – constantly expanding at an accelerating rate. The Big Bang was over ten years ago when the first smartphones exploded onto the scene.
Since then, these devices have become more and more affordable, data prices have dropped, and the app market has soared. The latest figures from Statista tell us that there are now 2.1 million apps in the Google Play store, and Apple users have 2 million applications to choose from in the Apple App Store – generating billions of downloads each year.
 Source: Statista.com.
Some of these mobile apps are games, others are e-commerce apps, still more are social networks, and even more still fit into categories as vast and varied as fitness, food, and finance. As such, anyone considering entering a market of such cosmic proportions needs to ensure that their mobile app is professionally built if it is to stand a chance of being a shooting star in app stores.
At Netguru, we have built hundreds of successful mobile apps for businesses around the world. Today, we want to outline the design, strategy, and development processes we follow to make these applications a success. Let’s dive in.
1. Problem Statement
Successful apps – like successful businesses in general – solve a genuine problem for customers. As such, the first step in the mobile app development process is to define, as succinctly as possible, the app idea and the problem you are trying to solve for the market. This is your Problem Statement – a concise (one or two sentences should be ample) description of the primary problem you want to address.
You may be tempted to try and list multiple problems you think your application will solve – and it might do, but each additional problem will require an additional feature. So, to begin with, you need to hone in on the single most important problem your mobile app will solve for customers – you can think about adding additional features later.
In summary – keep your statement focussed. A good problem statement serves as a communication tool, helping to get the whole team focused on the ultimate goal of the project from the outset.
Example: UBER
-
Problem: no communication between taxi drivers & their clients during the ride ordering process - ride ordering process takes too much time & effort.
-
Solution: a mobile app connecting drivers with people who need a ride from A to B, eliminating any unnecessary agents (call centers) & allowing for direct communication and ride status tracking.
Further reading:
-
We've got 99 problems — does your app solve one? (The Next Web)
-
5 Business Problems That Mobile App Development Can Solve (Glance)
-
Don't Just Build a Mobile App, Solve an Important Problem (AllTopStartups)
2. Verify Your Idea
Now that you understand the problem you are addressing, it’s time to ask yourself a serious question: is a mobile application really required to solve it? This is important. Not all projects are suitable for mobile. Things like games, social media, and messaging apps are of course all pretty safe bets – but if your idea will require a massive portal for managing lots of content and data, a website may be the better option.
You also need to identify your target group – i.e. who has the problem you’re planning to solve. This analysis should include the demographics, motivations, behaviour patterns, and goals of your buyer persona. How will this group use the application on their mobile devices? The more precise you can be when conducting these analyses, the more clarity you and your team will have, providing the essential groundwork for later stages in the project.
Example: Hailo
-
Hailo wanted to compete with UBER in NYC by offering good prices for yellow taxis ordered with their app. Unfortunately for them, the majority of yellow taxi drivers didn't use a mobile phone, which dramatically lowered the level of cars available to Hailo users.
Further read
-
Top 4 Reasons Why Most Mobile Apps Fail To Perform (Medium.com)
3. Competitor Research
Check the market. Are there similar applications or solutions already available that can solve the problem? If so, how do they do it (you can learn a lot from potential competitors, especially from experienced mobile app developers), and how will your mobile application do it differently/better? Check out the number of installs these competitor apps have generated – this will give you an indication of the potential size of the market. Also take a look through their ratings and reviews – what do users like and dislike about these apps? Is there something missing in the existing solutions that people are hungry for?
Competitor research is a crucial step – the more you know about the problem you are trying to solve, how others are already trying to solve it, and what the gaps there are in existing solutions, the more you will be able to tailor your app to meet the demands of your potential customers. Mobile app developers often emphasize the significance of user experience (UX) and user interface (UI) design in creating marketable and user-friendly apps, which can help your app stand out in the competitive mobile app space.
Further read:
-
Standing Out From The Crowd: Improving Your Mobile App With Competitive Analysis (Smashing Magazine)
-
How to benchmark your app with mobile app competitor analysis (Medium.com)
4. Product Design
With your idea verified and competitor research complete, now comes the time to start sketching out the first version of your mobile application – the minimum viable product (MVP) – with the product team.
During this process, you will write down all the things that you want your mobile app to do, and then rank them by priority. Go back to your problem statement. Use it to figure out precisely what your app’s primary functionality will be, what it will require to be a day-one success, and what can be added later. Not all of the features on your list will be crucial to the app’s core functionality, even though you think users might want them at some point. These features are likely great candidates for later versions of your mobile app, but for the MVP, it’s more important to spend time on what matters most – solving the primary problem.
With your list whittled down to core features only, the development team will now take a look and, if applicable, suggest some existing solutions that can be incorporated into your app to deliver them. It is sometimes better and more cost-effective to buy an existing tool – such as a search function, for instance – than to build everything from scratch. This approach ensures that the app's functionality is optimized for user experience and ease of navigation from the start.
Further read:
5. Wireframe
If everything looks good in terms of functionality, the next stage of product design is to make a wireframe – i.e. a two-dimensional visual guide that represents the skeletal framework of your mobile application’s interface. The wireframe will serve as a blueprint that defines your app’s structure, content, and functionality, whether you are developing native apps specifically built for a single platform or considering cross-platform solutions. Wireframes don’t include any visual design elements, which may be distracting at this stage. Rather, they focus entirely on the application’s information architecture and hierarchy – its usability, navigation, etc.
The wireframing stage essentially serves as the bridge between research and design. It often initially takes place on a whiteboard or with pen and paper, allowing you to visualise your app’s user flow simply. As such, any changes can be made easily at this stage – it’s much simpler (and cheaper) to erase a few strokes of the marker on a whiteboard than it is to rewrite code later in the development process.
Further read:
-
Design Process for Pros - Wireframing (Netguru)
-
The Votes Are In: The Top 7 Wireframing & Mockup Tools for Mobile App Pros (Hackernoon)
6. Application Design
With your application’s framework sketched out to everyone’s satisfaction, now is the time to get to work on its . There are many things to take into consideration here.
For starters, it’s important to ensure your designs are suitable for your target group. Is your app targeting teenagers or elderly people, for example? Men or women? Your designs need to be appropriate for your target audience. Consistency is also important. All views should follow the same style principles – if your main theme is white, then white should be used in as many views as possible.
As well as visual design, you will also now be focussing on user experience (UX) design and user interface (UI) design – and again, there are a number of things to bear in mind. To begin with, it’s imperative that the user flow is easy and consistent – all views and user actions should look and “feel” the same. Navigation should also be simple and predictable – the user should know intuitively where a button will take him/her when clicked.
From a UX perspective, it’s also important to carefully consider the use of things like animations and pop-ups. Too many animations, for example, can be distracting and take up too much of your users’ time, whereas overusing pop-ups can interrupt user flow – often it is better to simply display a message rather than force the user into an additional interaction to close the pop-up.
It’s also important to know your platform and stick to the official guidelines of the platform you are targeting. Consulting Google Material Design for Android and Human Interface for iOS will ensure you design your interface properly for the respective platforms. When developing an iOS app, it is crucial to follow these guidelines to create a seamless user experience.
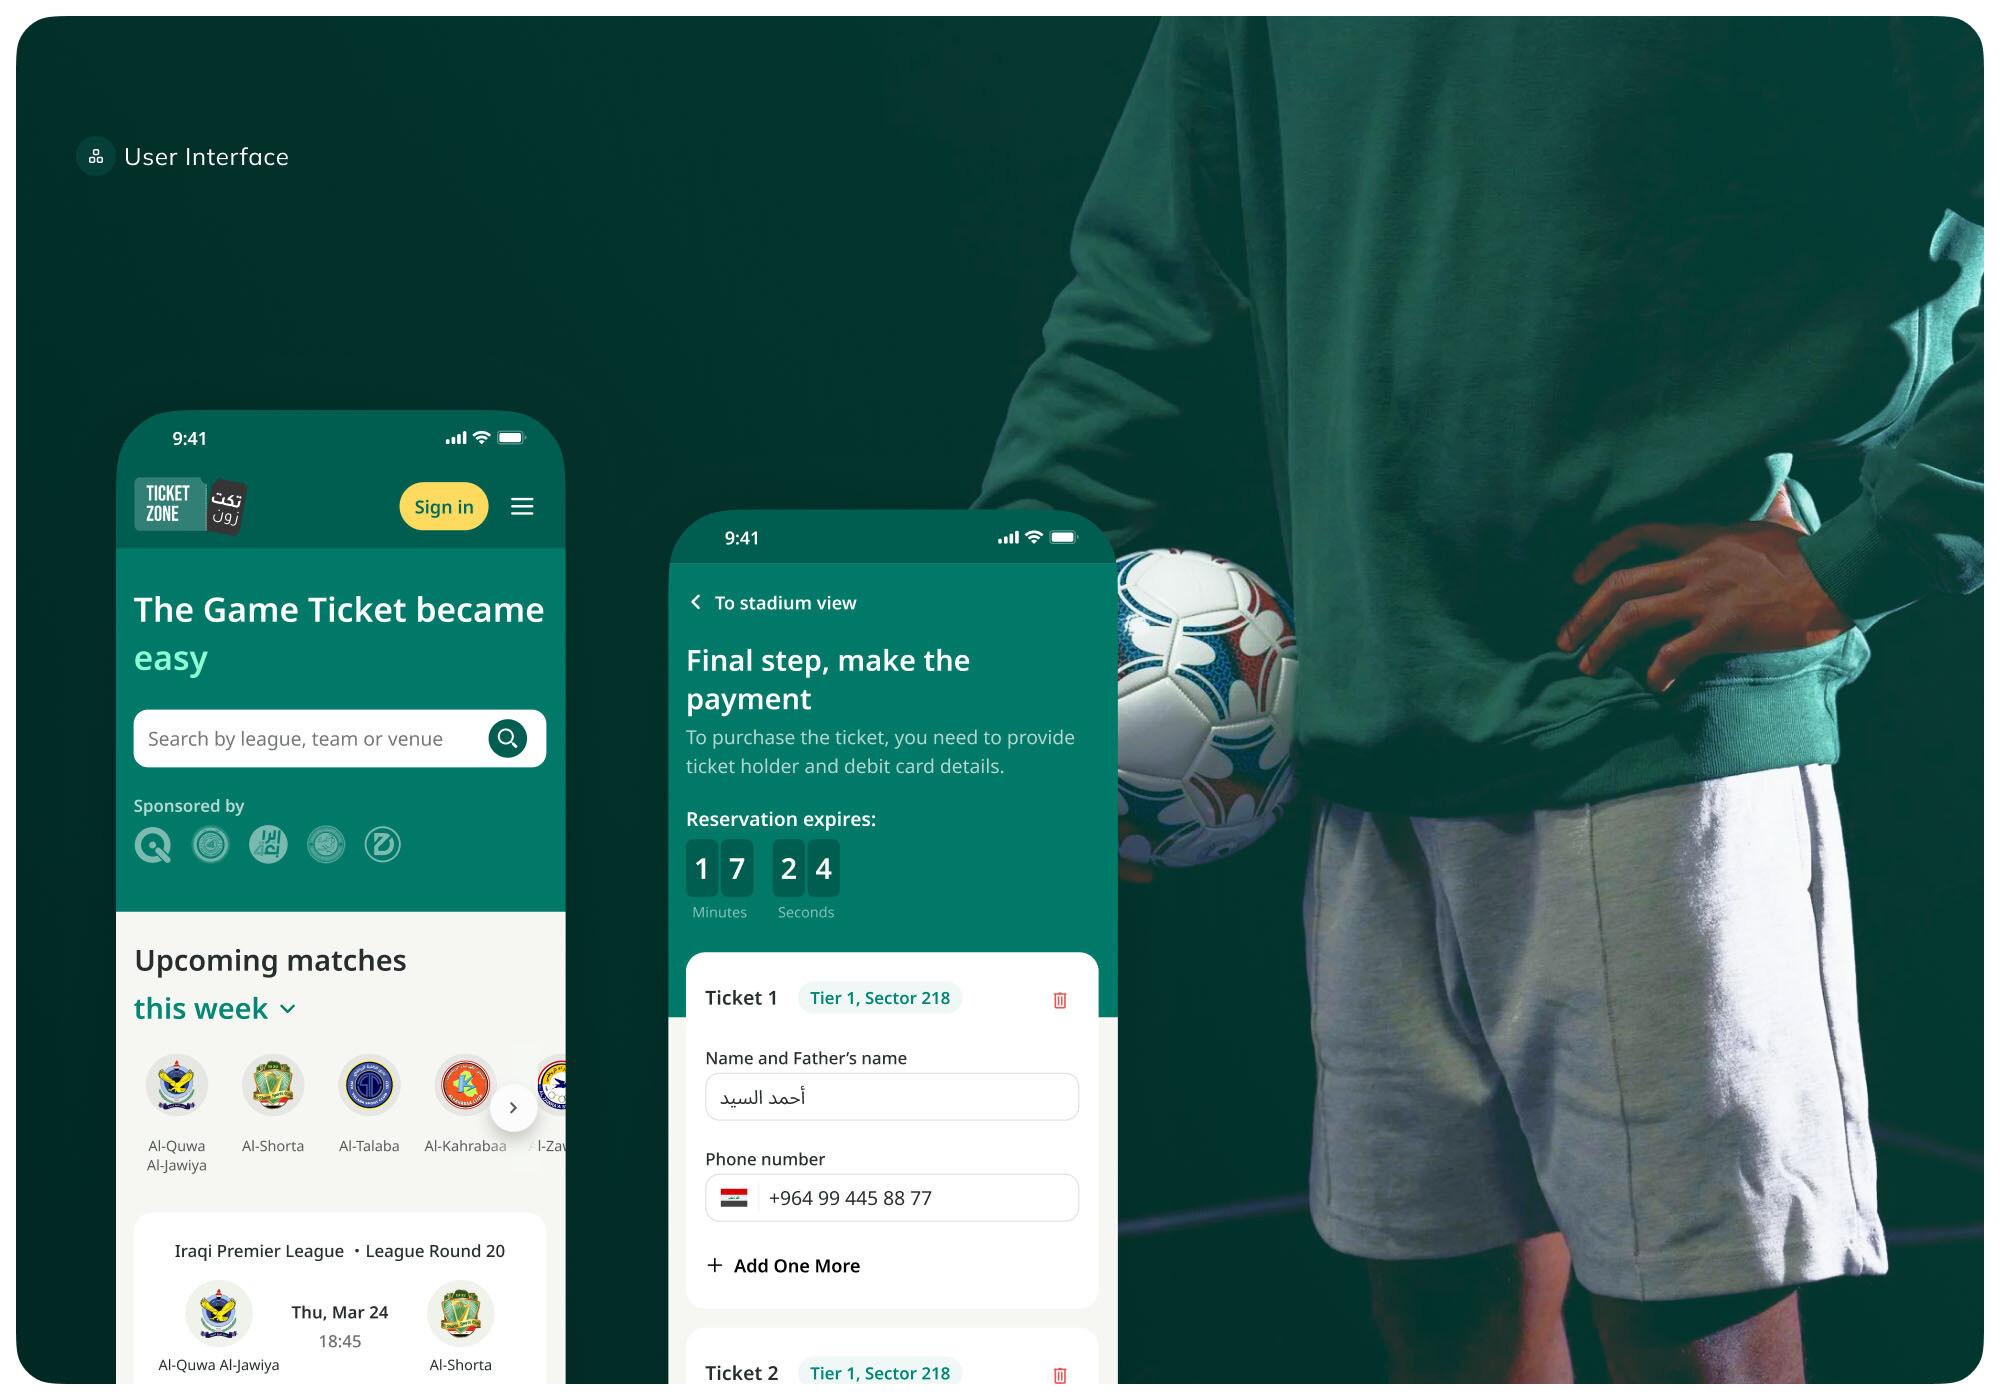
Example: Ticket Zone
- Ticket Zone set out to digitize the ticketing process for the Iraqi Premier League, but the primary challenge was designing an app that would be intuitive for a user base with varying levels of tech proficiency. The design team had to focus on creating a clean, simple interface that allowed users to easily purchase tickets and access them on game day, all while ensuring the app was responsive on both mobile and web platforms. Clear navigation and a streamlined user journey were critical in achieving high adoption rates and making the app accessible to all fans.
Further read:
Now comes the time for the development team to start realising your visions put forth in the design stages. Initially, a working prototype will be developed, which will provide validation (or otherwise) of the app’s functionality as you envision it, and the team will continue to work on the application from there, testing it with users, and going back and forth with you until it all comes together.
Developers are, of course, experts, and will provide you with valuable feedback and input at each stage which must be taken into consideration. For example, your wireframes will serve as a guide for the backend structures you’ll need to support your app – APIs, servers, push notification services, etc. However, if your application is relatively small and not heavily dependent on cross-platform interaction, it may make more senses to utilise a Mobile Backend as a Solution platform such as Firebase. During this phase, developers may also ask you to rethink some designs, or to reconsider a particularly complex feature or animation. As such, you may need to decide if you want to wait longer (and pay more), or allow the developers to simplify the application to save time (and money).
8. Testing
When it comes to mobile app development, testing early and often is the only way to ensure a robust and high-functioning application. As such, a Quality Assurance (QA) Specialist should join the team as soon as possible, ensuring the app is unit tested for usability, compatibility, security, stress, performance, and across different operating systems.
Each and every feature must be put through unit tests to ensure they all work as intended. These tests should be automated, which will significantly speed up the work. In addition, user acceptance testing should be carried out with members from your target group to ensure not only that your application works, but that it works for the intended user in a satisfactory manner. The experiences of these early users will then be passed back to developers, who can make adjustments to make sure customer satisfaction of the end product will be maximized.
Further read:
9. Shipping
Now comes the big moment – deployment. Your app has been rigorously tested, and is now ready to be formally launched. First, however, you need to ensure that the app is properly configured for release on each mobile platform. Prepare high-resolution images of your application for use in app stores, as well as a high-quality written description, and other marketing materials.
Be patient when it comes to store approval – especially with Apple’s App Store. Apple manually reviews all apps submitted, and it usually takes a few days before your app will be reviewed. Sometimes, Apple will request that you make alterations to comply with various regulations before being granted entry. With Google, your app will usually be live in the store on the day of submission.
Further read:
10. Updates
Of course, mobile app development doesn’t end at launch. Once your application gets into the hands of users, feedback will start rolling in, and you will need to incorporate this into future versions of the app as you release updates to include some or all of the additional features that didn’t make it into the original version. This could also be an opportunity to expand your app's capabilities to web apps, allowing you to use a single codebase for both mobile and web applications.
Over to You
There are many steps to the mobile app development process and lots of crucial decision making and testing involved along the way. However, this is a tried and tested process, and each step is necessary to arrive at the best possible outcome – a fantastic mobile application your users will love.
If you're looking to build a mobile app, you've come to the right place. At Netguru, we have years of experience developing apps for businesses of all sizes - from daily apps like Shine to banking institutions or world's largest tech events - at any stage of the process, and have both the team and the knowledge needed to deliver a stellar application that will shine bright in app stores. Let's get in touch today.


