Firebase Messaging - an easy to use marketing tool
But not so many developers know that it can be achieved with Firebase tools! Let’s take a look at two very useful services that will boost your app. Setting them up is really easy and shouldn’t take much time even when you’re not a very experienced React Native developer.
Firebase Cloud Messaging
Firebase Cloud Messaging (FCM) provides a really simple solution for push notifications, but also some other minor functionalities. When using Firebase “stack” it may be quite useful to use it also when it comes to push notifications. Unfortunately, our favorite package react-native-firebase currently has some issues with FCM, but it’s not completely broken, so let’s take a look at how we can implement it.
Installation
The first thing you have to do is to create your Firebase project. Then you can install react-native-firebase and after that you have to install this package:
yarn add @react-native-firebase/messaging
Now you’re ready to go if you just want to use it on Android. When it comes to iOS, you have to implement permission requesting because iOS automatically blocks notifications and alerts. In order to do that, you can use the requestPermission method. Below you can find a snippet of code which I used in my example app:
const requestPermission = async () => {
    const authStatus = await messaging().requestPermission();
    const enabled =
      authStatus === messaging.AuthorizationStatus.AUTHORIZED ||
      authStatus === messaging.AuthorizationStatus.PROVISIONAL;

    if (enabled) {
      console.log('Authorization status:', authStatus);
    }
};
Common use cases
Now we can move on to handling those messages. We can do it in many ways and because of that there are many use-cases for FCM. Let’s talk about the two most common ones:
- Push notifications;
- Silent background update of in-app data.
Push notifications
The first use-case is the most obvious one, so let’s take a look at how we can handle it in our React Native app. Basically we just have to react on some triggers and then use the received data just as we want to. Below you can find a fragment of code that is responsible for handling notifications when the app is running in the background (not killed!). It will be triggered when we click on a notification - the app will be opened in the foreground and the onNotificationOpenedApp method should be automatically called.
messaging().onNotificationOpenedApp(async (remoteMessage) => {
const dataFromNotification = remoteMessage?.data;
// here you can handle notification using carried data
});
If we want to handle notifications when the app is running in the foreground, we just have to add this fragment:
messaging().onMessage(async (remoteMessage) => {
const dataFromNotification = remoteMessage?.data;
// here you can handle notification using carried data
});These fragments should be implemented inside the componentDidMount or useEffect lifecycle hook. As you can see it’s really similar to OneSignal push notification handling, but here comes trouble…
When the app is totally killed, the app should be opened and the getInitialNotification method should be triggered. Unfortunately, it’s not working now. It will probably be fixed in a future update, but currently there are about 3-4 open issues on GitHub that concern this problem. Here you can find a snippet of code that should work when react-native-firebase will be updated:
messaging().getInitialNotification(async (remoteMessage) => {
  const dataFromNotification = remoteMessage?.data;
  // here you can handle notification using carried data
});
Silent update of in-app data
Using FCM you can easily update data inside your app when the app is running in the background. It’s especially useful when you want to update collections (e.g. in Redux) when something changes in the database. You can generate a Firebase Cloud Message with Firebase Functions on some triggers and then handle the message silently inside the app just using this method:
messaging().setBackgroundMessageHandler(async remoteMessage => {
console.log('Message handled in the background!', remoteMessage);
});
It’s really important to put this snippet as early in the app as possible. You can add it in App.js or some service component that will be rendered in App.js. Then inside this handler you can dispatch some actions to update the state.
Warning! iOS will automatically open the app in background state when a Firebase Cloud Message comes. In order to make it work just as on Android you have to add this fragment of code to your index.js file:
const HeadlessCheck = ({isHeadless}) => {
if (isHeadless) {
// App has been launched in the background by iOS, ignore
return null;
}
return <App />;
};

AppRegistry.registerComponent(appName, () => HeadlessCheck);
How to send Firebase Cloud Messages?
There are multiple ways to do that - you can implement a sending mechanism using Cloud Functions for Firebase, you can use a REST API to generate and send them, or you can use the Firebase Console. Let’s focus on the latest one, because mobile devs don’t have to know how to write backends!
Sending messages with Firebase Console is a bit limited - you cannot send messages to given Topics and you can send only basic messages. It will probably be sufficient in many cases, so let’s check how to do it. Go to your Firebase Console, click Cloud Messaging, and finally click Create Message. The next thing you will see is this form, which you have to fill out:
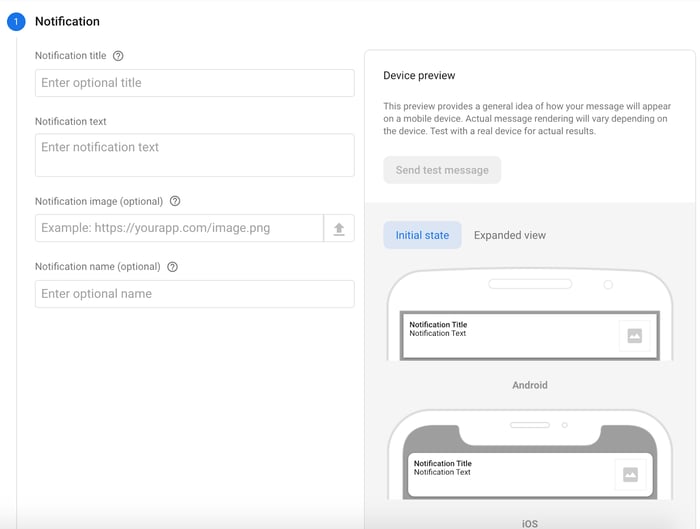
First, you have to provide a notification title and a notification text. A notification image is optional and requires upgrading to the Blaze plan. A notification name is also optional, but you can provide one without upgrading to the Blaze plan.
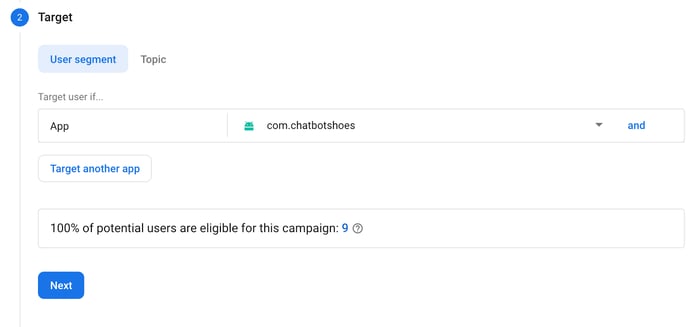
The next thing you have to do is to choose the app which this message will be sent to.

Then you will have to set sending time to scheduled or now.
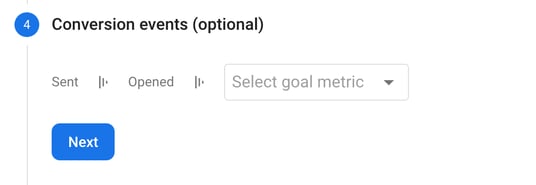
Before sending you can also add conversion events which will be triggered on notification click.
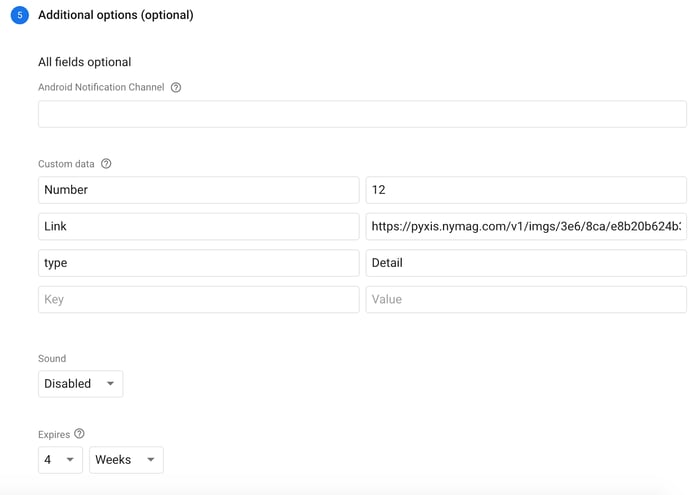
The last part of the form is probably the most important one. Here you can provide additional data which will be carried with the message. You can then access this data for example to navigate to the desired screen inside the app.
In-App Messaging
In-App Messaging can be pretty useful when you want to create marketing campaigns that will boost some of the app’s functionalities. But there are some other use-cases that will change your opinion about them. It’s worth saying that Firebase In-App Messaging is really easy to implement in React Native, so you will probably want to use it in your next app!
Common use cases
Onboarding
The first and most obvious thing you can do with in-app messaging is onboarding new users. You can customize messages to contain cool images that will welcome new users and a short description with essential information.
New feature introduction
You can send in-app messages every time a new feature is implemented in your app. Doing that, more users will now know about cool functionalities you’ve developed.
Product promotion
You can easily promote products or services inside your app. For example, when creating an app that offers users the ability to buy train tickets, you can show in-app messages every time there is a discount available. This message can be sent in parallel to push notifications. Using both these methods greatly increases the effectiveness of your campaign.
Implementation
React Native part
The only thing you have to do to enable in-app messages inside your React Native app is to install:
yarn add @react-native-firebase/in-app-messaging
along with the core react-native-firebase package, of course. This package does not provide many functionalities - it will only allow you to suppress in-app messages when you don’t want to show them (i.e. you can show them only when the user is logged in to the app). To do that you can create a method that will toggle receiving in-app messages:
import inAppMessaging from '@react-native-firebase/in-app-messaging';

const toggleInAppMessaging = (value) => {
inAppMessaging().setMessagesDisplaySuppressed(value);
};
export default toggleInAppMessaging;
And that’s basically it - now we can receive in-app messages. We can also set up dynamic or deep links which we can use along with in-app messaging.
Firebase Console part
We can send in-app messages only from Firebase Console right now. I think it should also be available via some API in order to send them from the backend, but unfortunately it’s not possible. So every time we need to create a campaign with some in-app messages we have to visit the Firebase Console. Let’s take a look what steps should we take to create those messages:
- Go to Grow → In-App Messaging.
- Click the New Campaign button.
- Fill in the form:

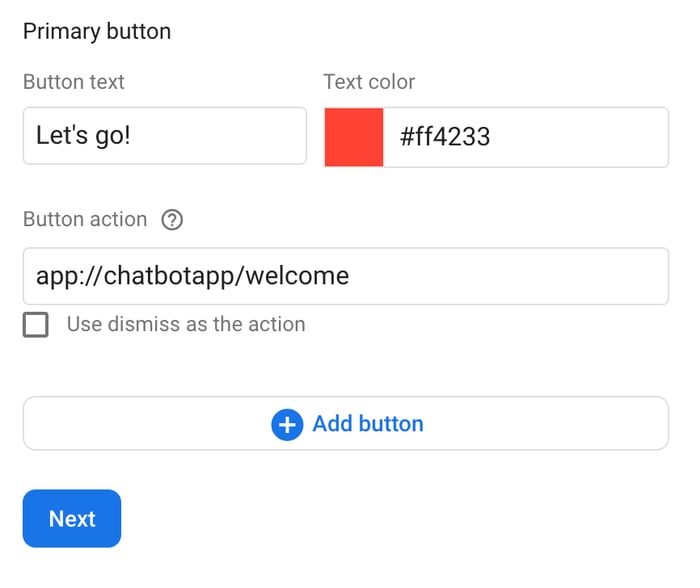
In the first few input fields we have to provide info such as message title, message body and images that will be displayed in our app. Currently you can only assign images via URL, which basically means that you have to host them somewhere. The official tip says that you can upgrade to the Blaze plan and host them with Firebase Hosting, but you can also use your free quota of Firebase Storage and provide a link to an image inside your bucket. The next thing you have to do is to choose button behavior. Here you can assign a deep link or a dynamic link that will be handled inside our app.

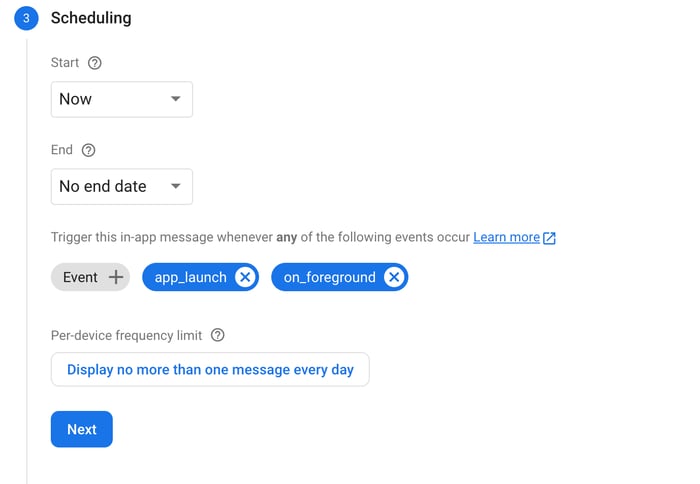
The third and most important step is scheduling. Here you have to provide a timeframe in which messages will be sent to users. You also have to choose events which will trigger messages. The last thing you can do in this step is choose a sending frequency.
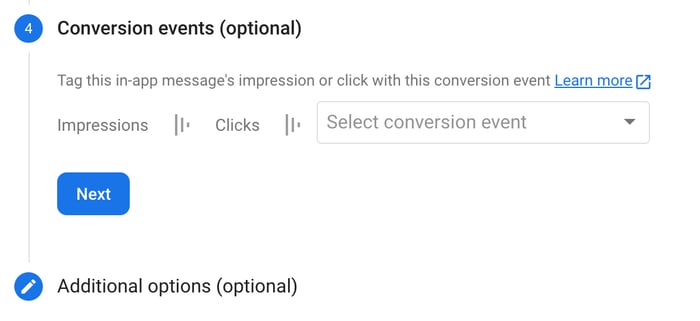
There are two more additional steps. The first one is assigning conversion events. The second one gives us an option to send optional data that can be handled in-app. Unfortunately the react-native-firebase package doesn’t provide any methods to handle it.
That’s it! Now you can test your in-app messages using the functionality available in Firebase. Just click the “Test on device” button. You will have to provide an installation ID which you will find using adb logcat (for Android). Look for this kind of message:FIAM.Headless: Starting InAppMessaging runtime with Installation ID f3KWNfksRbu1yEre1jzzCl